

Table of Contents
- System Requirements for Syncing Photos Between Mac and iPhone
- Enable iCloud Photos Sync on Your Mac and iPhone
- Troubleshoot iCloud Photo Sync Issues
- Manually Transfer Photos from iPhone to Mac via Finder
- AirDrop Photos from iPhone to Mac Quickly
- Sync Without Cloud Services: Local-Only Workflows
- Check Sync Status and Manage Storage Settings
- Preserve Your Synced Photos in Custom Frames
- Frequently Asked Questions
Last Updated: September 30, 2026
System Requirements for Syncing Photos Between Mac and iPhone
Before you sync photos between Mac and iPhone, make sure both devices meet the basic requirements. You'll need macOS 13 or newer on your Mac and iOS 16 or later on your iPhone. Both devices must use the same Apple ID account.
A stable internet connection is essential for syncing to work smoothly. WiFi is best, though cellular data works in a pinch. Your Mac should have at least 5GB of free storage space to hold synced photos and metadata.

Here's what to check before you start:
- Both devices logged in with the same Apple ID
- macOS 13+ on Mac, iOS 16+ on iPhone
- WiFi connection available
- Sufficient storage space on both devices
- iCloud Photos enabled in System Settings (Mac) and Settings (iPhone)
If your devices don't meet these requirements, the sync process won't work properly. Older operating systems lack the necessary features to sync photos between Mac and iPhone reliably.
Enable iCloud Photos Sync on Your Mac and iPhone
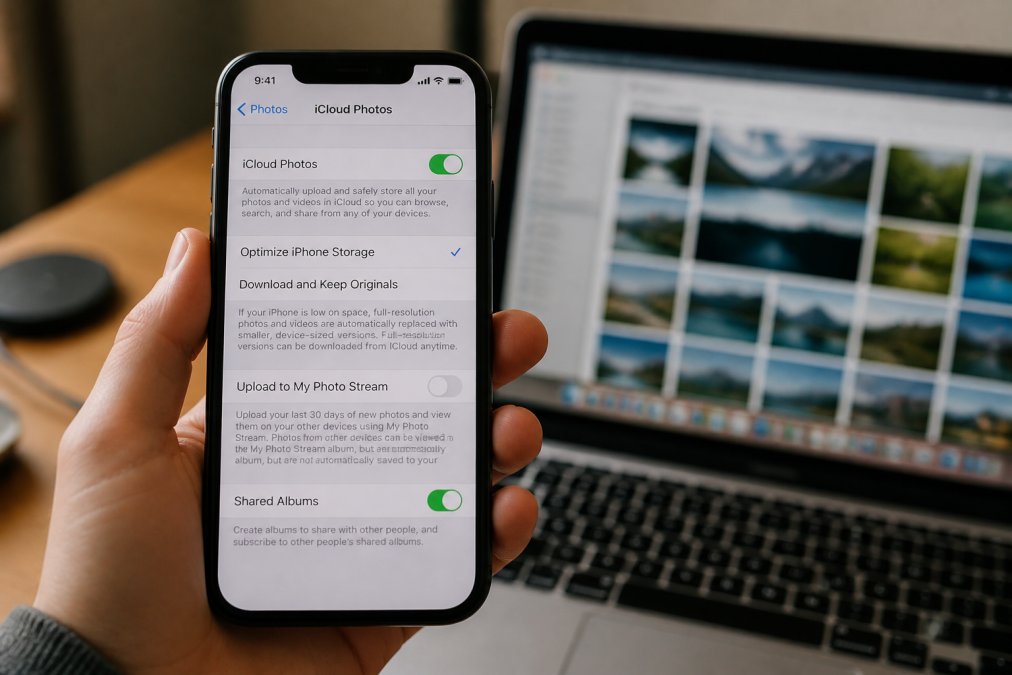
To sync photos between Mac and iPhone using iCloud, you need to enable iCloud Photos on both devices. This is the easiest and most automatic way to keep your photo library in sync.
On your iPhone:
- Open Settings
- Tap your name at the top
- Select iCloud
- Tap Photos
- Toggle on "iCloud Photos"
Your iPhone will now upload all photos and videos to iCloud automatically. The process happens in the background over WiFi or cellular data.
On your Mac:
- Open System Settings
- Click your Apple ID name at the top
- Select iCloud
- Check the box next to "Photos"
- Open the Photos app to complete setup
Once you enable iCloud Photos on both devices, your photo library syncs automatically. New photos taken on your iPhone appear on your Mac within minutes. Photos edited on your Mac sync back to your iPhone instantly.
Troubleshoot iCloud Photo Sync Issues
When sync photos between Mac and iPhone fails, the problem usually falls into a few categories. Check your internet connection first. A weak WiFi signal or spotty cellular data prevents iCloud from uploading or downloading photos.
Common sync problems and quick fixes:
- Photos not appearing: Check that iCloud Photos is enabled on both devices. Wait 15 minutes for sync to complete.
- Stuck uploads: Restart the Photos app on your iPhone. Force quit and reopen it.
- Storage full: Check your iCloud storage in Settings. Upgrade your plan if needed.
- Connection issues: Disconnect WiFi and reconnect. Toggle airplane mode off and on.
- Metadata delays: Metadata (dates, locations, edits) syncs separately. Wait a few minutes after photos upload.
Advanced troubleshooting for persistent sync failures:
If basic steps don't resolve the issue, your sync may be stuck in a stalled state. On your Mac, the Photos daemon can become unresponsive, preventing uploads or downloads from completing.
To reset the Photos sync daemon on Mac:
- Quit the Photos app completely
- Open Terminal (Applications > Utilities > Terminal)
- Type:
killall -9 photodand press Enter - Wait 10 seconds
- Reopen the Photos app
This forces the sync service to restart fresh. The Photos daemon will resume syncing within 30 seconds of reopening the app.
To clear the Photos cache on Mac:
- Quit the Photos app
- Open Finder
- Press Command + Shift + G to open "Go to Folder"
- Type:
~/Library/Caches/com.apple.Photosand press Enter - Delete the contents of this folder
- Reopen Photos
Clearing the cache removes corrupted metadata that can block sync. This is especially useful if you see duplicate photos or if edits aren't syncing between devices.
On your iPhone, force a fresh iCloud connection:
Sign out of iCloud and sign back in. This forces a complete reconnection to Apple's servers and often resolves stuck syncs. Go to Settings > [Your Name] > iCloud and scroll down to Sign Out. After signing out, wait 30 seconds, then sign back in with your Apple ID.
Check your iCloud account status:
If sync photos between Mac and iPhone still isn't working after these steps, your iCloud account may have a problem. Check your Apple ID account status at appleid.apple.com. Look for any security alerts, two-factor authentication issues, or account lockouts that might be blocking sync. If you see a security alert, approve it on a trusted device to restore sync access.
Monitor sync progress in detail:
On your Mac, open the Photos app and go to Photos > Preferences > iCloud. If you see a progress bar, note whether it's advancing. A progress bar that doesn't move for more than 5 minutes indicates a stuck sync. In this case, use the daemon reset steps above.
On your iPhone, open Settings > [Your Name] > iCloud > Photos. The status should show "Uploading" with a percentage, or "Optimizing" if your device is processing photos. If it shows "Paused" or a red warning, address the underlying issue (connection, storage, or account status) before retrying.
Manually Transfer Photos from iPhone to Mac via Finder
If you prefer not to use iCloud Photos, you can manually transfer photos from iPhone to Mac using Finder. This method gives you complete control over which photos move and where they go.
Steps to transfer photos manually:
- Connect your iPhone to your Mac with a USB cable
- Open Finder on your Mac
- Look for your iPhone in the sidebar under Devices
- Click on your iPhone name
- Select the Photos tab
- Check "Sync Photos from"
- Choose a folder location for your photos
- Click Apply
Finder imports photos into the folder you selected. The transfer happens one time only. New photos taken after the sync won't automatically transfer unless you repeat these steps.
This method works well if you want to sync photos between Mac and iPhone without relying on cloud storage. You maintain all files locally on your devices. No subscription to iCloud storage is required.
The manual approach takes longer than iCloud Photos, especially for large libraries.
AirDrop Photos from iPhone to Mac Quickly
AirDrop offers the fastest way to send a few photos from your iPhone to your Mac without cables or cloud services. It uses Bluetooth and WiFi for direct device-to-device transfer.
To AirDrop photos:
- Open Photos on your iPhone
- Select the photos you want to send
- Tap the Share button
- Select AirDrop
- Tap your Mac's name
- Accept the transfer on your Mac
Sync Without Cloud Services: Local-Only Workflows
Some people prefer to sync photos between Mac and iPhone without storing anything in iCloud. A local-only workflow keeps all your photos on your devices and under your control.
Local sync options:
- Finder import: Use USB cable to import photos manually to your Mac
- AirDrop: Send photos wirelessly without cloud storage
- External hard drive: Store photos on an external drive connected to your Mac
- Encrypted local storage: Use third-party apps that sync locally over WiFi
Check Sync Status and Manage Storage Settings
You need to monitor your sync progress and manage your iCloud storage to keep photos syncing smoothly. A full iCloud account stops all uploads until you free up space.
To check sync status on iPhone:
- Open Settings
- Tap iCloud
- Select Photos
- Look at "iCloud Photos" status
To check sync status on Mac:
- Open the Photos app
- Go to Photos > Preferences
- Click the iCloud tab
- View the sync progress bar
To manage iCloud storage:
- Open Settings (iPhone) or System Settings (Mac)
- Tap your Apple ID
- Select iCloud
- Tap Manage Storage
- Review what's using space
Preserve Your Synced Photos in Custom Frames
Once you've synced photos between Mac and iPhone successfully, display your favorites in beautiful frames. Nikko Blu Boutique offers handcrafted photo frames that showcase your most treasured moments.

Frequently Asked Questions
Why isn't my Mac photos syncing with my iPhone?
Check that both devices are signed into the same Apple ID and connected to WiFi. Go to System Settings on your iPhone and tap your name, then iCloud, and verify iCloud Photos is enabled. On your Mac, open System Settings, select your Apple ID, then iCloud, and toggle on iCloud Photos. If sync still fails, sign out of iCloud on both devices, restart them, and sign back in.
Can I sync photos without using iCloud storage?
Yes. Use Finder on your Mac to manually import photos via USB cable, or use AirDrop for wireless transfer without cloud storage. You can also store photos locally on your Mac and use USB cable backup for archival. These methods keep your photos private and don't require an iCloud subscription, though they require manual management instead of automatic syncing.
How do I transfer specific albums instead of my entire library?
iCloud Photos syncs your entire library by default. For selective syncing, use Finder or AirDrop to transfer only the albums you need. Alternatively, create a new iCloud account with limited photos, or use a Mac app that lets you choose which albums to sync. This approach gives you control over what transfers between devices.
What happens if I decide to switch to Android or Windows in the future?
You can export all your photos from iCloud before switching devices. On your Mac, select photos in the Photos app and drag them to a folder, or use iCloud.com to download your entire library. Your photos remain yours and can be transferred to any device. Keep backups on external drives to ensure you don't lose access to your memories.
Syncing photos between Mac and iPhone doesn't have to be complicated. Whether you choose iCloud Photos for automatic syncing or prefer manual methods like Finder and AirDrop, you have options that fit your workflow. Start with the method that matches your needs, then adjust as you discover what works best for your devices and lifestyle.